Terraform initial setup and first run

Terraform is an IaC (Infrastructure as a Code) by HashiCorp (IBM). The tool enables managing the infrastructure with code. Read more about Terraform, it's capabilities, philosophy and more in their introduction page. In this article I will describe:
- How to install Terraform in Linux (Debian 13).
- The initial setup of the provider (Google Cloud).
- Creating a simple resource with Terraform (Bucket).
In the future an Ad will be seen here (only for non-members).
How to install
In most cases for Linux, Terraform doesn't come as part of the distribution's package manager, you will need to download the binary or add HashiCrop's repository into your package manager, in order to install terraform.

HashiCorp - Developer - Terraform - Install
Downloading the binary
I'll choose the binary according to my OS and architecture, which are Debian 13 and amd64.
Prerequisites:
- wget (or curl),
sudo apt install wget. - unzip,
sudo apt install unzip. - install,
sudo apt install coreutils.
Please remember to verify the binary file, before actually installing/running them.

HashiCorp - Developer - Verify Binary
# working in a specific directory
# easier to clean up later.
TF_VERSION=1.13.1
TF_ARCH=amd64
WORKDIR=~/temp
mkdir -p ${WORKDIR}
cd ${WORKDIR}

# Downloading
wget "https://releases.hashicorp.com/terraform/${TF_VERSION}/terraform_${TF_VERSION}_linux_${TF_ARCH}.zip"

# Unpacking
unzip "terraform_${TF_VERSION}_linux_${TF_ARCH}.zip"

# Installing
sudo install terraform /usr/local/bin
Installing the binary directly
Repository
This is probably the preferred way, as updates will also be available automatically via the repository. You may want to markhold the package if you wish to avoid upgrading when not actually intending to.
Prerequisites:
- gpg
sudo apt install gpg. - lsb_release
sudo apt install lsb-release. - wget.
# Downloading HashiCorp's signing public key
wget -O - https://apt.releases.hashicorp.com/gpg | sudo gpg --dearmor -o /usr/share/keyrings/hashicorp-archive-keyring.gpg

# Adding the repo to apt's sources
echo "deb [arch=$(dpkg --print-architecture) signed-by=/usr/share/keyrings/hashicorp-archive-keyring.gpg] https://apt.releases.hashicorp.com $(grep -oP '(?<=UBUNTU_CODENAME=).*' /etc/os-release || lsb_release -cs) main" | sudo tee /etc/apt/sources.list.d/hashicorp.list

# Updating the package list, and installing
TF_VERSION=1.13.1
TF_VERSION_BUILD=1
sudo apt update && sudo apt install terraform=${TF_VERSION}-${TF_VERSION_BUILD}
Installing via HashiCorp repository
Check installation
To make sure terraform is installed correct, run the command terraform --version.

terraform --version outputConfiguration
While Terraform isn't opinionated of filenames (left of the dot ., the filename extension does mean something), there are several rules to follow when starting your first project, the essential files should be:
.
├── backend.tf
├── locals.tf
├── main.tf
├── override.tf
├── outputs.tf
├── providers.tf
├── variables.tf
├── terraform.tfvars
├── modules/
|   ├── module-A/
|   ├── module-B/
.   .
.   .
Terraform filenames

providers.tf
This file configure the providers used in a project, a project may have more than one provider. You can also define the version(s) the provider should be.
# Configurating the default project, region and zone.
provider "google" {
  project = "behemoth-example"
  region  = "me-west1"
  zone    = "me-west1-a"
}

# Forcing version compliance
terraform {
  required_providers {
    google = {
      version = ">= 6.3.0 < 7.0.0"
    }
  }
}
providers.tf example
backend.tf
While using a local statefile is fine for local tests, it shouldn't be the case in any other environment beyond that. Rembmer that the location where the statefile is save, should already exists, and Terraform should have R/W access to it.
# The statefile will be stored in a bucket named.
# The bucket should pre-exists.
terraform {
  backend "gcs" {
    bucket = "behemoth-example-gcs-state"
    prefix = "tf/state"
  }
}
backend.tf example

locals.tf
Local values should be defined in this file (if they're global, used in multiple different files), or in the top of a file if the local variable is used just in that file.
# Local variables
locals {
  company = "Behemoth LTD"
  name    = "Itzhak Daniel"
}
locals.tf example

variables.tf
Declaring variables which will be later be used in the resources defined along the project. The declaration can contain default value, conditions and more...
# Declaring a variable with default value
variable "gcp_az_list" {
  description = "List of availability zones in Israel"
  type        = list(string)
  default     = ["me-west1-a",
                 "me-west1-b",
                 "me-west1-c"]
}
variables.tf example

terraform.tfvars
After a variable is declared (variables.tf), assigning a value (which isn't the default) is done with .tfvars files. Terraform will automatically load terraform.tfvars, terraform.tfvars.json and all files ending with .auto.tfvars or .auto.tfvars.json.
gcp_az_list = ["me-west1-a"]terraform.tfvars example
main.tf
This file contain the resource definitions, the state they should be in. Once a project got big enough, main.tf should be broken to segments of the resources in the project. For example network.tf for all related VPC, subnets, firewall resources, and compute.tf for all VMs related resources.
# Resource to create a bucket
resource "google_storage_bucket" "example" {
  name                        = "example-bucket-behemoth-ltd"
  location                    = "EU"
  uniform_bucket_level_access = true
  force_destroy               = true
}
main.tf example

outputs.tf
Use outputs to make information about the state of the project available to other Terraform projects (when used with terraform_remote_state) or just to your command line.
output "example_bucket" {
  description = "Name of the bucket created"
  value       = google_storage_bucket.example.name
}
outputs.tf example

override.tf
Override files are used to modify an existing resource defined in another .tf file. Terraform will load override.tf or override.tf.json and any file ends with _override.tf and _override.tf.json lastly and will "merge" the changes into the resource defined in both places. HashiCorp advise against using overrides, as it make the code harder to understand.
# Modifying the bucket location to US.
resource "google_storage_bucket" "example" {
  location      = "US"
}
override.tf example

Authentication
Each provider will have it's own method(s) of authenticating the user, with Google Cloud there are several methods. In my example I will use a service account key, but the preferred way is service account impersonation.
If you're using service account keys, please read the following document by Google.
Running
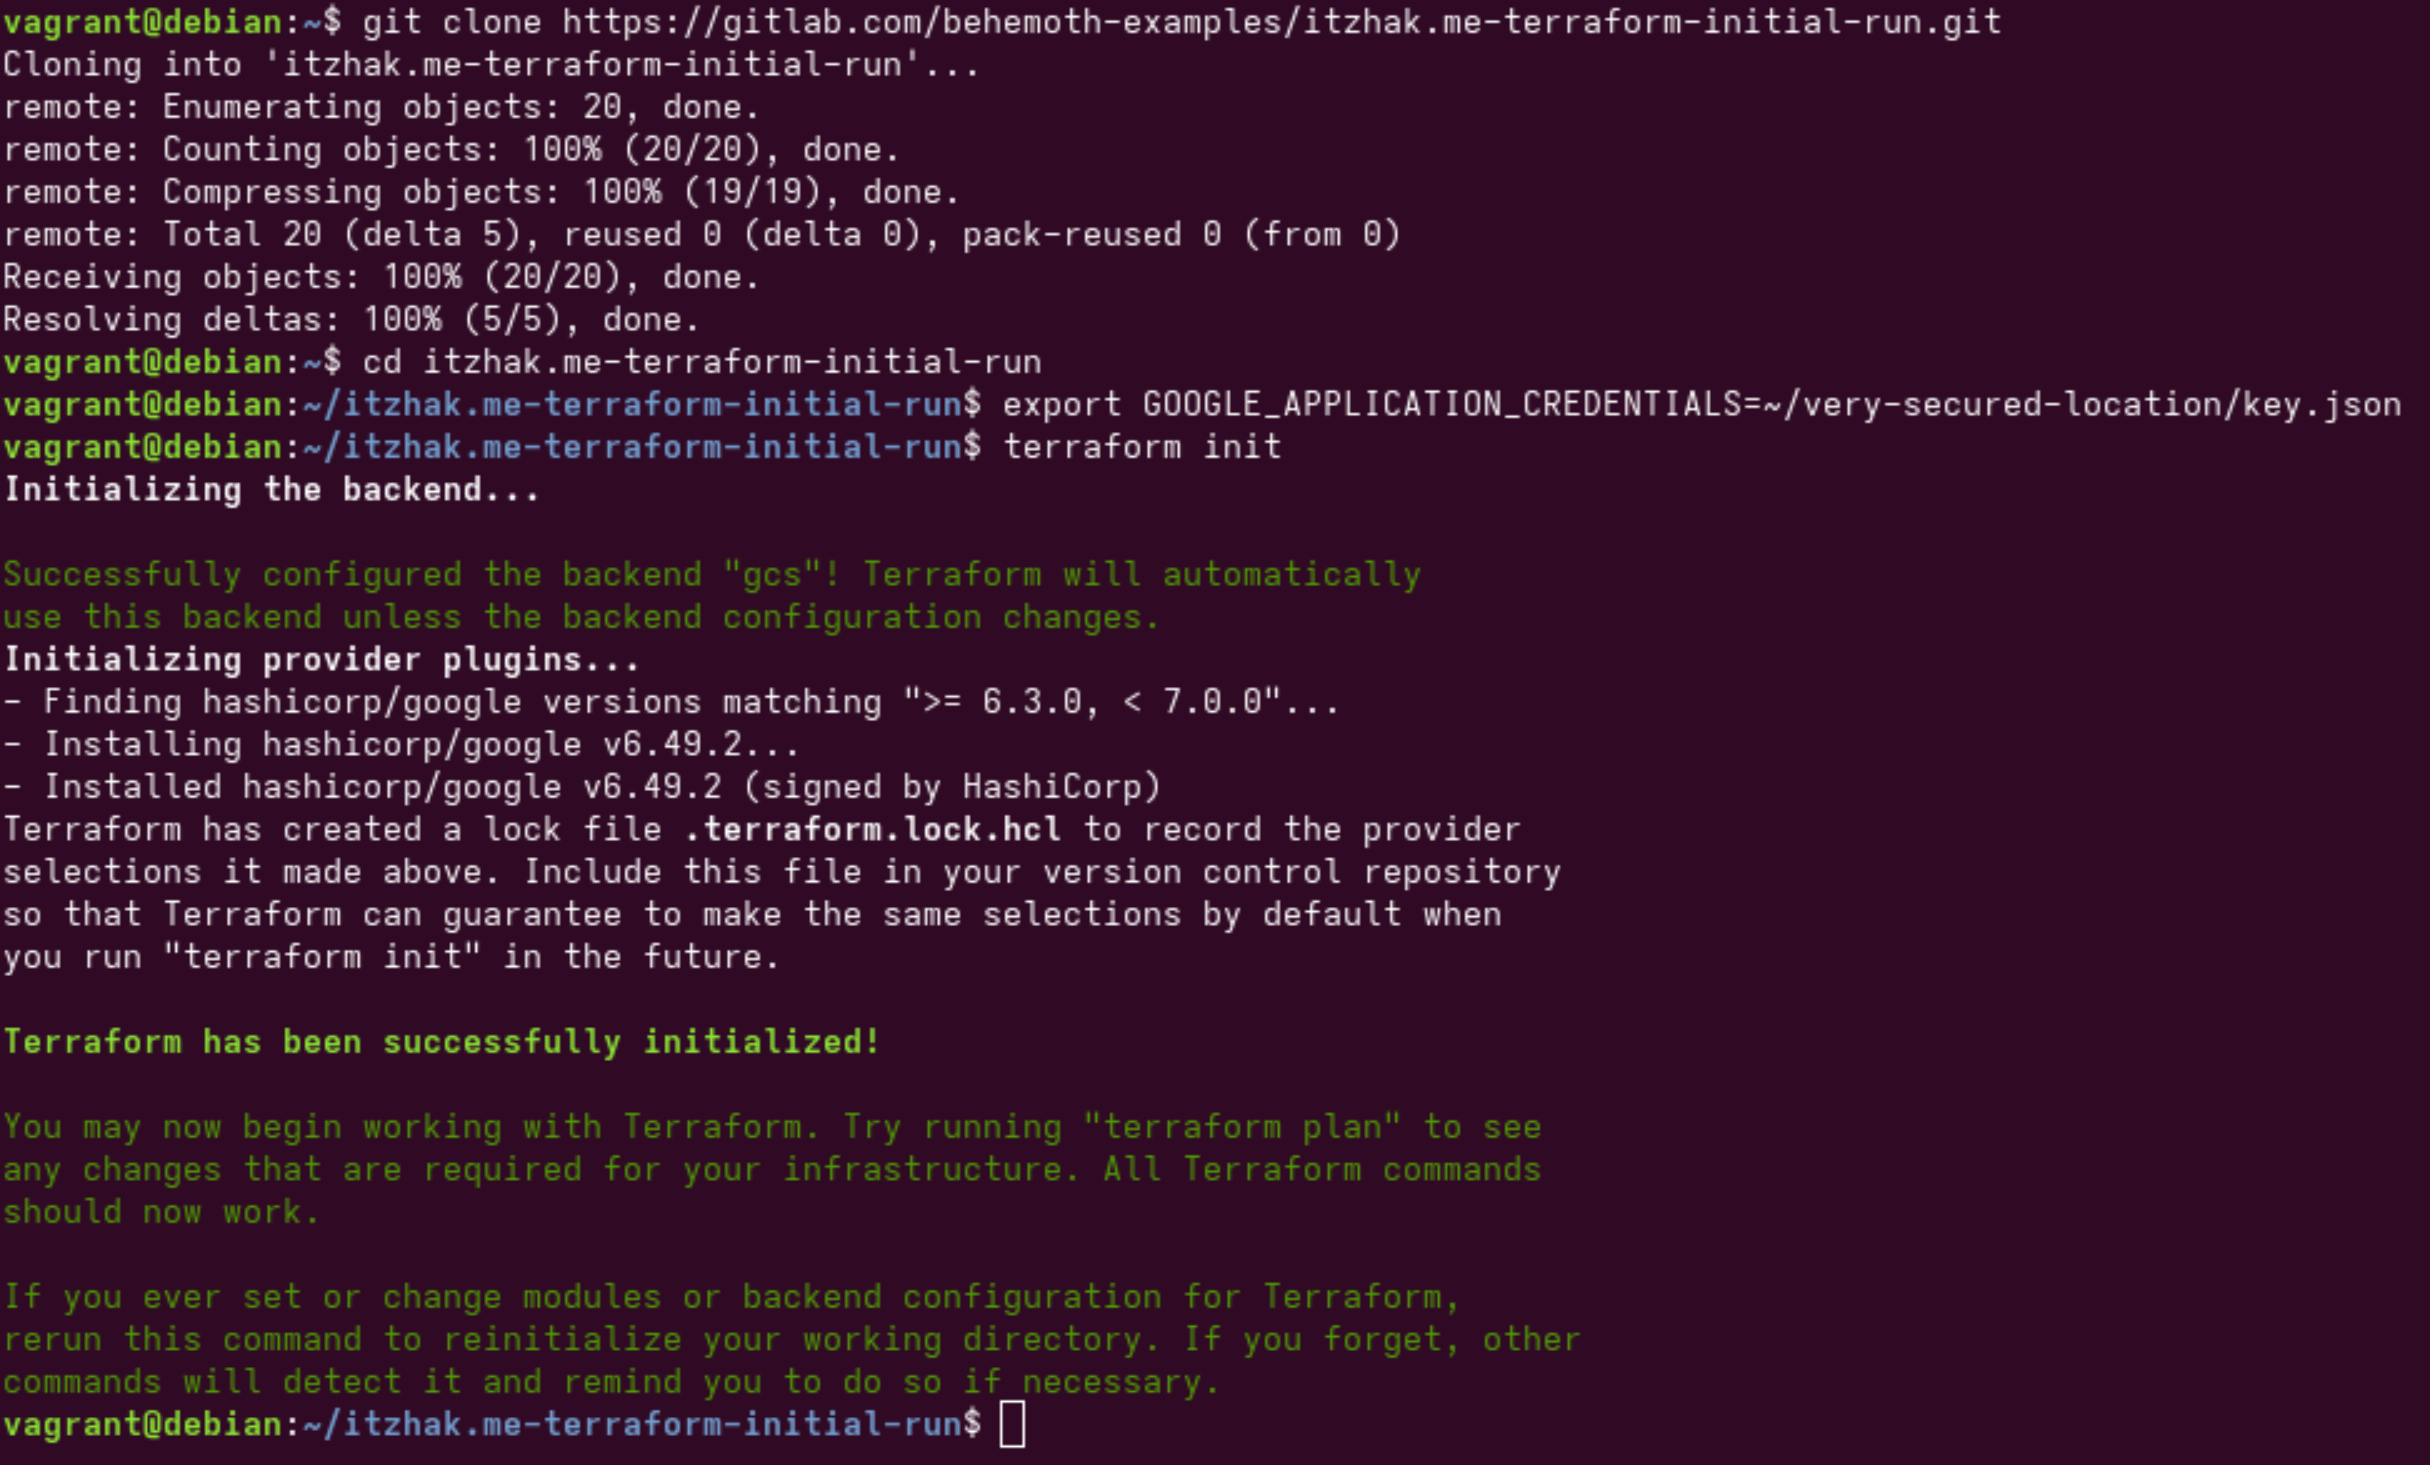
After I've create a service account, created a key for it, grant it the permissions required for it to complete it's role and downloaded the JSON file locally, I'm ready to run my first Terraform project. Feel free to clone my example repository and follow along, or view the image gallery below.
# Clone
git clone https://gitlab.com/behemoth-examples/itzhak.me-terraform-initial-run.git

# Go inside
cd itzhak.me-terraform-initial-run

# Tell Terraform where to find the service account key
export GOOGLE_APPLICATION_CREDENTIALS=~/very-secured-location/key.json

# Initiate the project
terraform init
Commands
# Validate the code
terraform validate
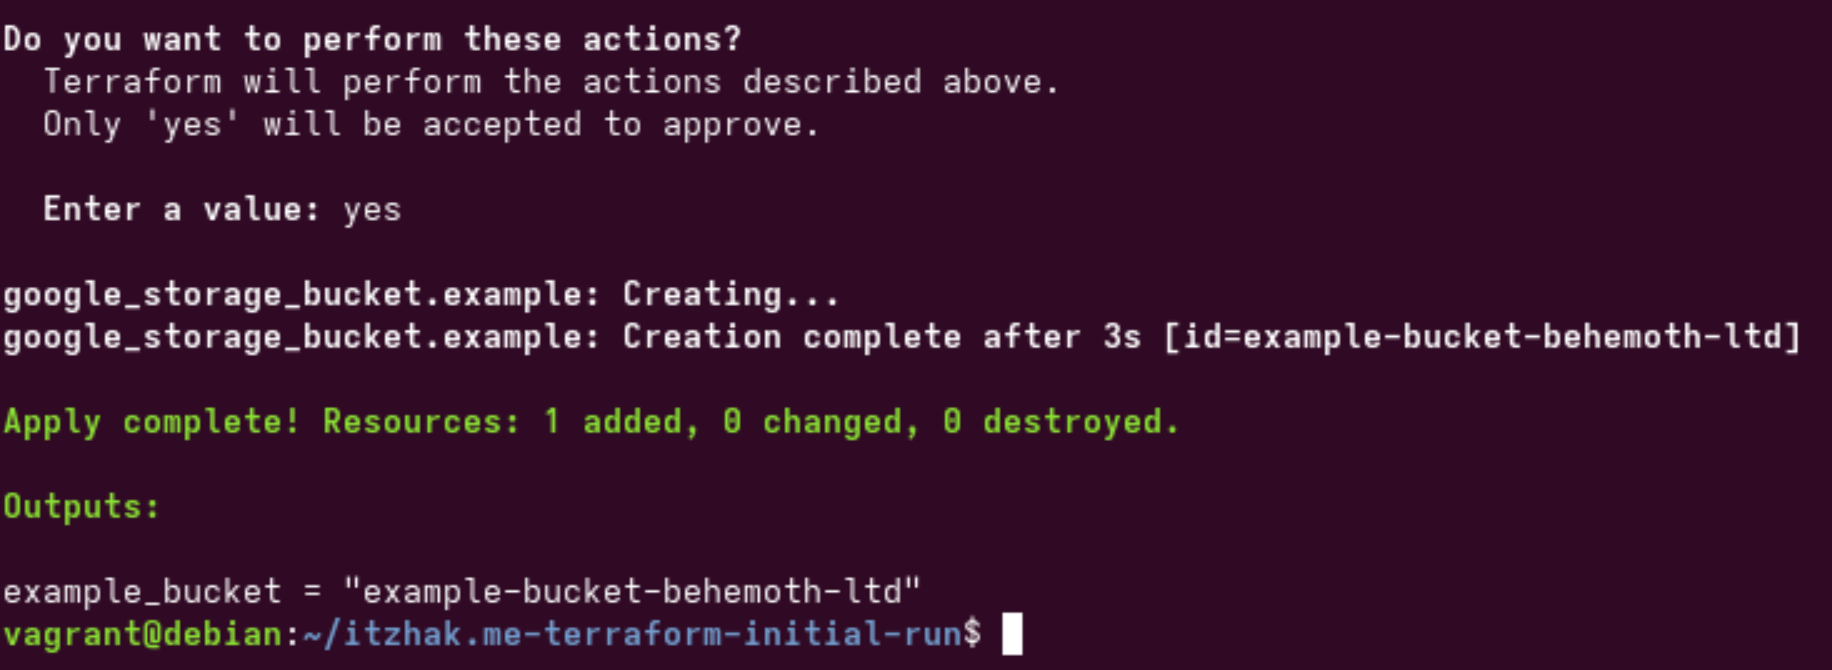
# Apply, write "yes" in order to actually apply.
terraform applyCommands

After writing "yes", Terraform will create the resource defined in the project.
And lastly, let's destroy the resource
# Destroy, type "yes" to actually destroy.
terraform destroy
Commands
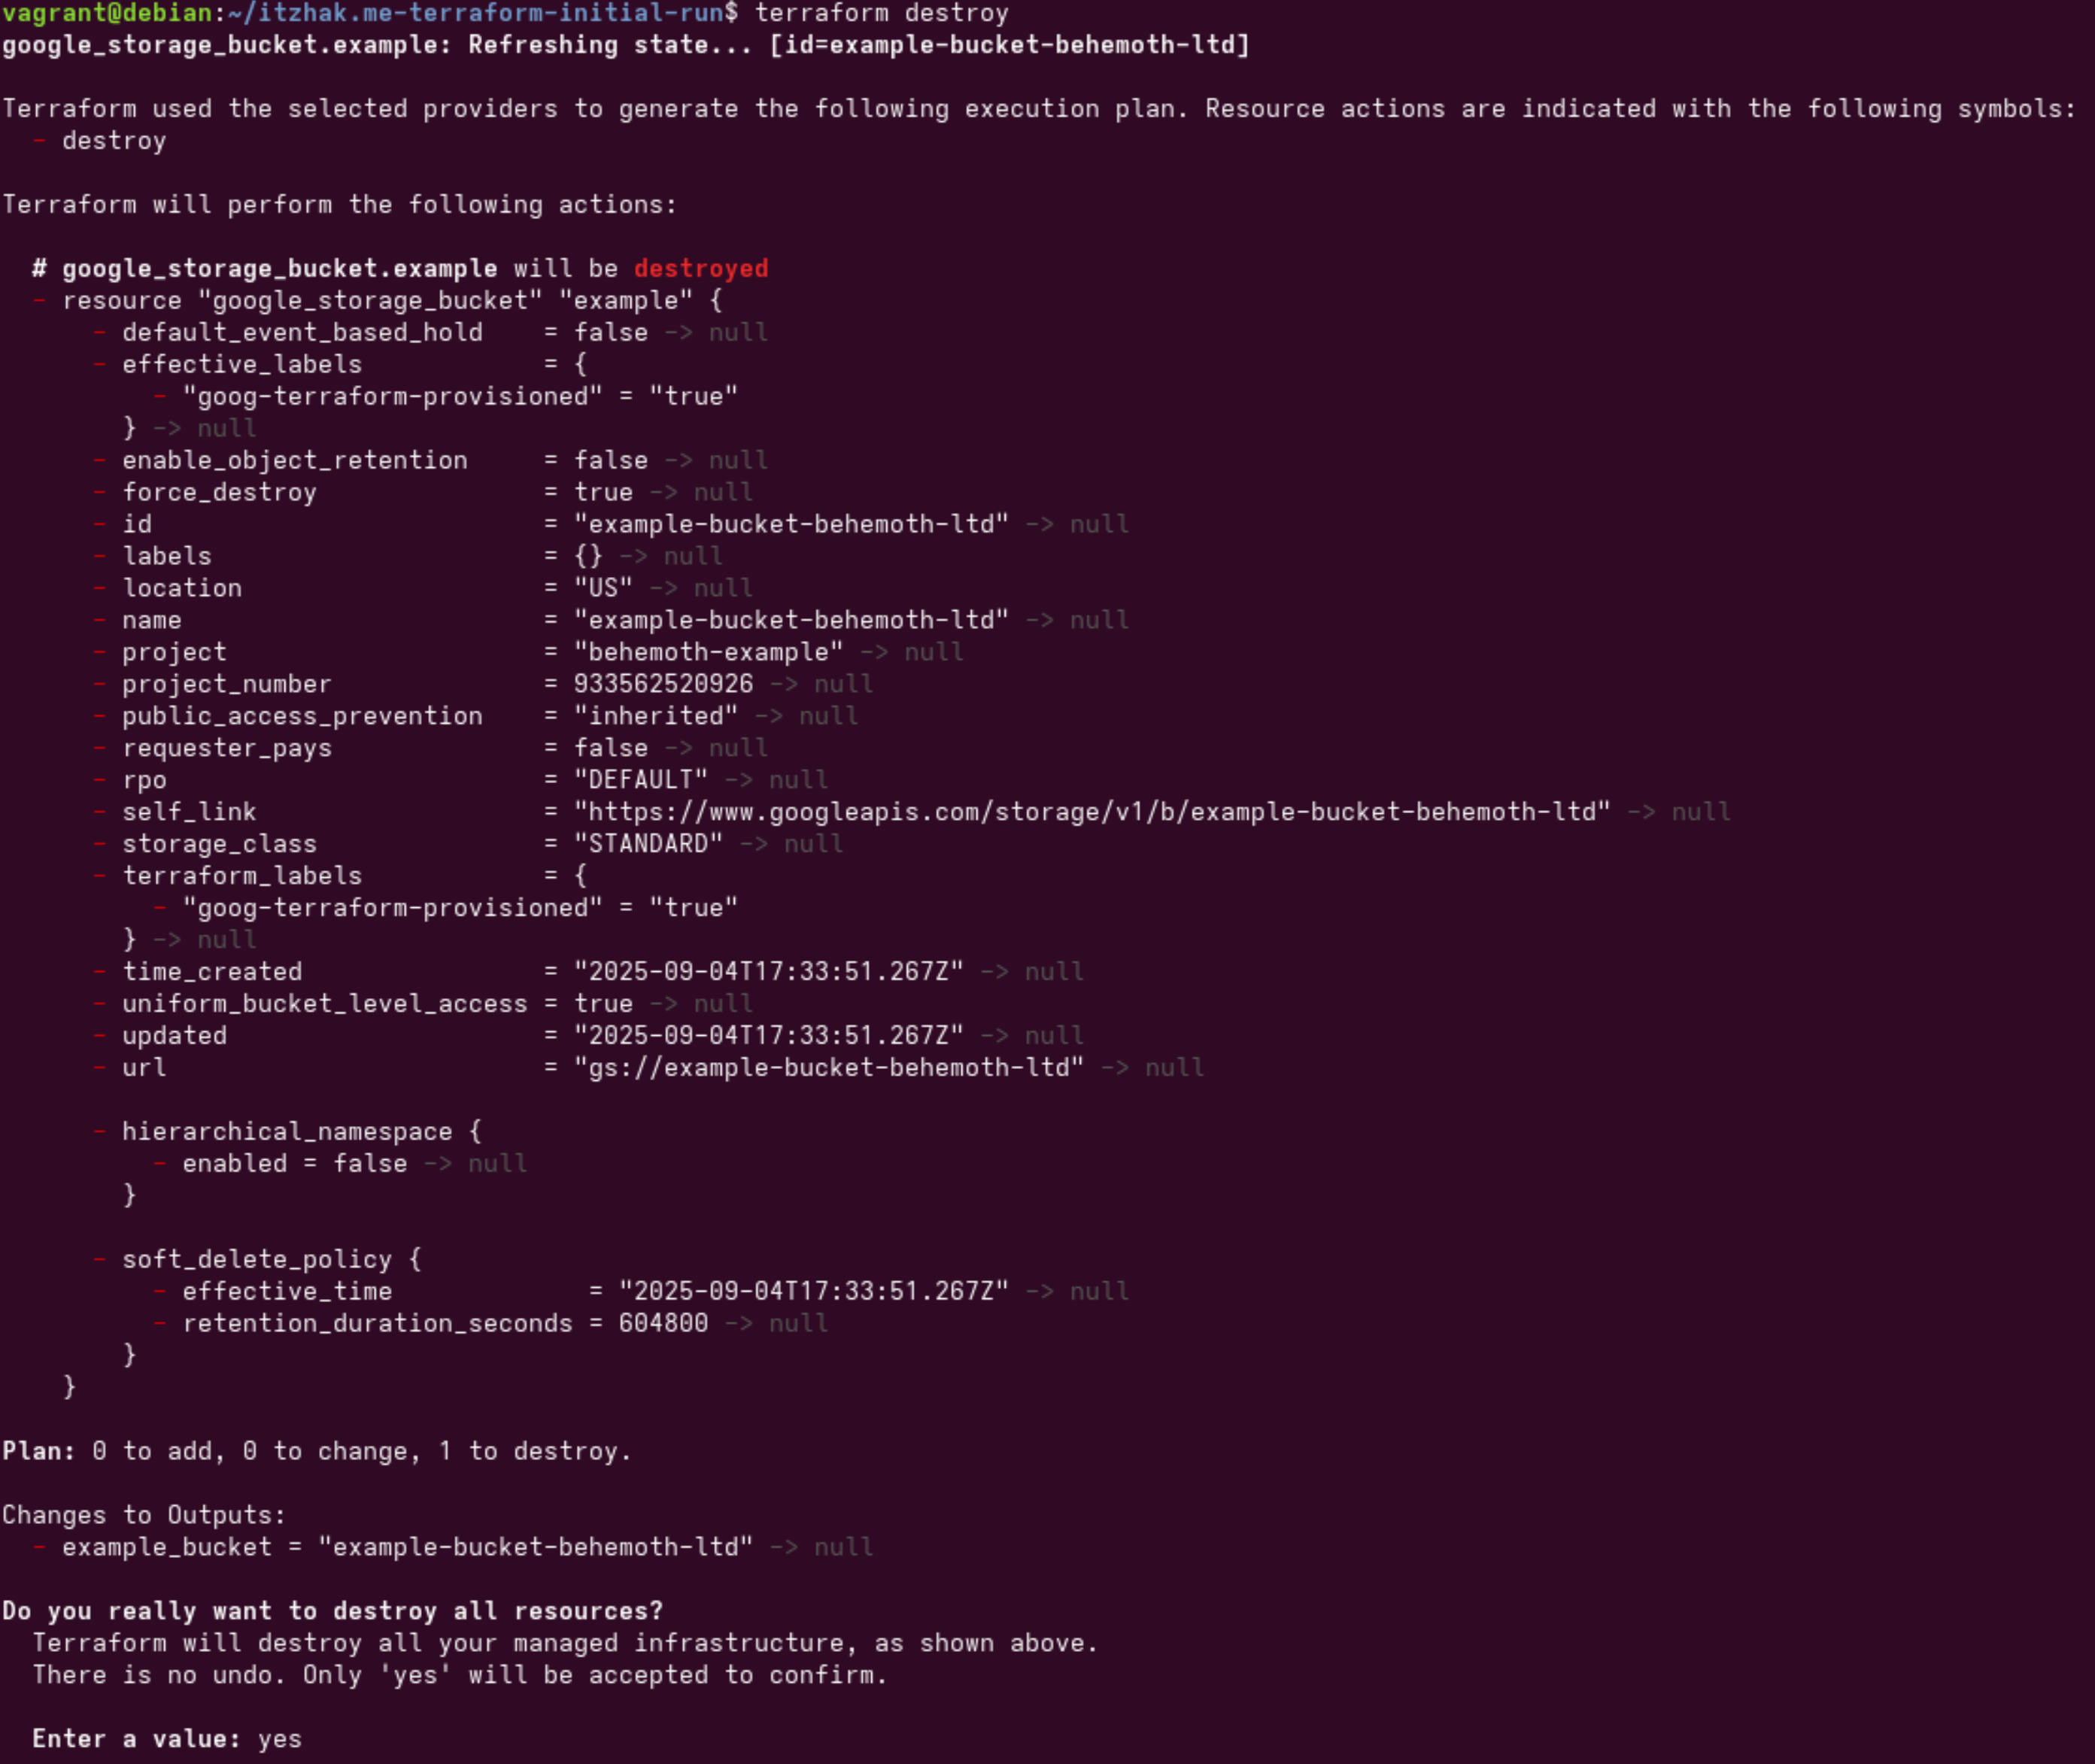
After typing "yes", the resources Terraform have created will be removed.

In the future an Ad will be seen here (only for non-members).
That's all for now, in this article, I went over:
- How to install Terraform.
- Project files structure.
- How to authenticate (Google provider)
- A simple project example that create a bucket in GCS.
Feel free to review the extra reading below, and please consider to subscribe and comment on the article, your support and feed-back is important.
Extra reading


Member discussion